Setup and Use HomeGroup in Windows 10
HomeGroup can be defined as a local network sharing feature in Windows OS that makes it easy for multiple computers to share common resources like Files, Photos, Documents, Printers and devices with other computers residing on the same network. HomeGroup is only available on Windows 7, Windows 8 and Windows 10, you won’t be able to connect computers using Windows Vista or Windows XP to HomeGroup. While you can join a HomeGroup on a PC running Windows RT 8.1, you cannot create a HomeGroup or share content with the HomeGroup.
How to Setup HomeGroup in Windows 10
Follow the steps below to setup a HomeGroup on your Windows 10 Computer.
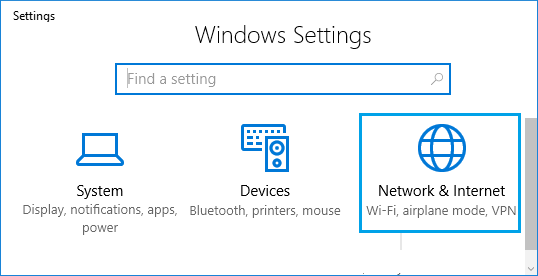
Click on the Start button and then click on the Settings Icon.
On the Settings screen, click on Network and Internet icon
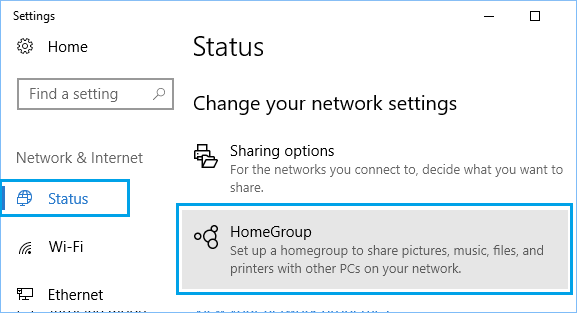
On the next screen, click on Status in the left pane and click on HomeGroup option located under “Change your network settings” heading in right pane.
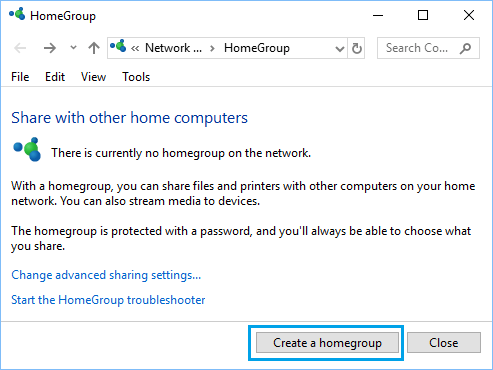
On the HomeGroup screen, click on Create a HomeGroup button.
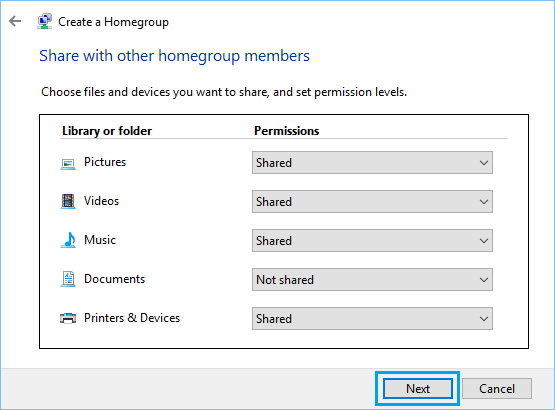
5. On the next information screen, click on Next. 6. On the next screen, you use the drop-downs to choose what you want to Share with Home Group computers and click on Next.
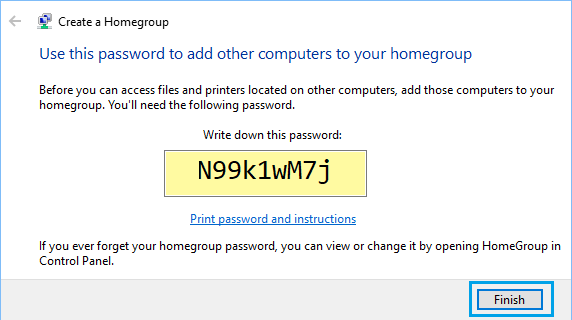
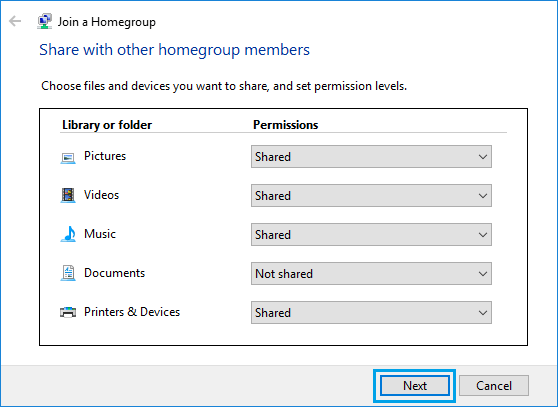
Note: By default, Pictures, Videos, Music, Printers & Devices will be set as shared, while Documents will not be shared. 7. On the next screen, you will see a Password created by Windows for the HomeGroup. Note down this password, as it will be needed to allow other computers to access Files, Printers and other common resources on the network.
- Click on the Finish button to complete the process of setting up HomeGroup in Windows 10.
How to Add Computers to HomeGroup in Windows 10
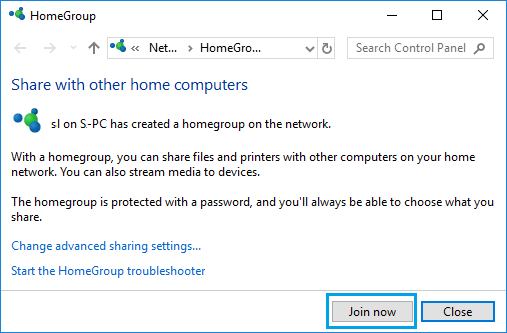
Now that you have created a HomeGroup and generated a password for the HomeGroup. The next step is to Add other computers to this HomeGroup.
- Login to the computer that you want to Add to the HomeGroup.
- Go to Settings > Network & Internet > Status > HomeGroup. 3. On the next screen, click on the Join Now button.
4. On the next information screen, click on the Next button. 5. On the next screen, use the drop-downs to select Folders, Printers and Devices that you want to Share with HomeGroup and click on Next.
- On the next screen, type the HomeGroup Password and click on Next.
- Click on Finish to complete the setup.
How to Remove Computers From HomeGroup
At any time you can remove a computer from HomeGroup by following the steps below
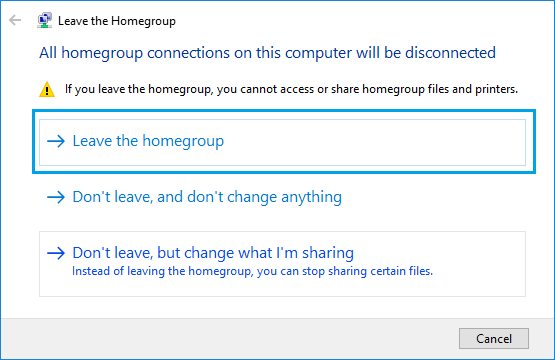
Go to Settings > Network & Internet > Status > HomeGroup.
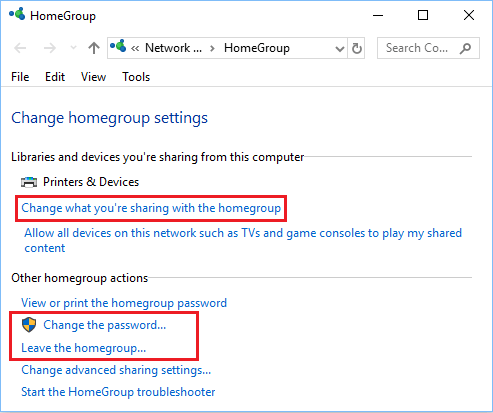
On the next screen, click on Leave the HomeGroup… link.
On the pop-up, click on Leave HomeGroup option to confirm.
How to Change HomeGroup Password
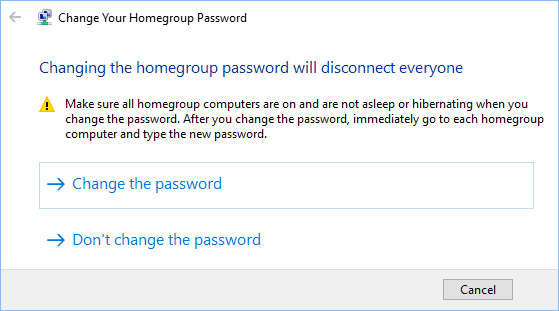
Before you change HomeGroup password, make sure that all HomeGroup computers are ON (not asleep or hibernating)
- Go to Settings > Network & Internet > Status > HomeGroup.
- On the next screen, click on Change HomeGroup Password… Link
3. Click on Change Password option.
4. On the next screen, type your new HomeGroup Password and click on Finish.
How to Add New Folder to HomeGroup
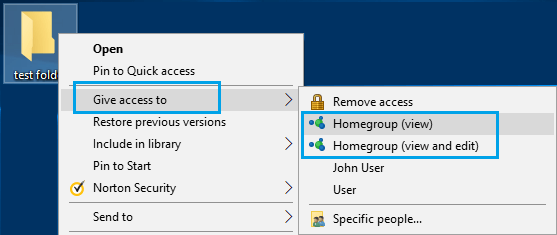
The simplest way to Add a new Folder to HomeGroup is to right-click on the Folder, select Give Access to and click on HomeGroup View option.
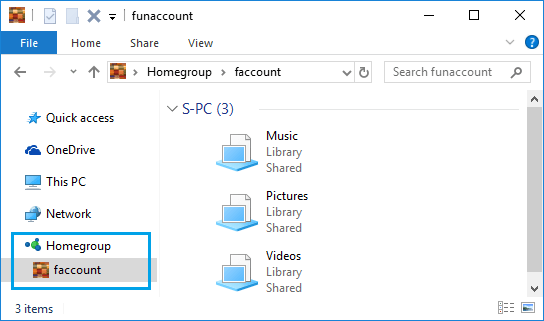
Note: Selecting HomeGroup (View & Edit) option will allow others to edit your files. Once you have shared a Folder in HomeGroup, other computers on the HomeGroup network can access this shared folder by opening File Explorer (Win+E) and clicking on the Computer Name under HomeGroup in the side-menu.
If You are Having Problems Creating HomeGroup
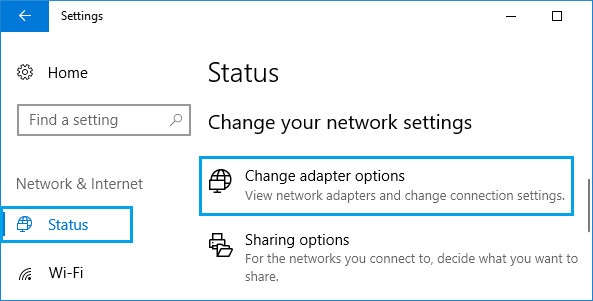
Make sure that only the computer on which you are creating the new HomeGroup is open and all other computers and devices are shut down. Next, make sure that your computer is able to use Internet Protocol Version 6 (TCP/IPv6). Open Settings > Network & Internet > Status > Change Adapter Options.
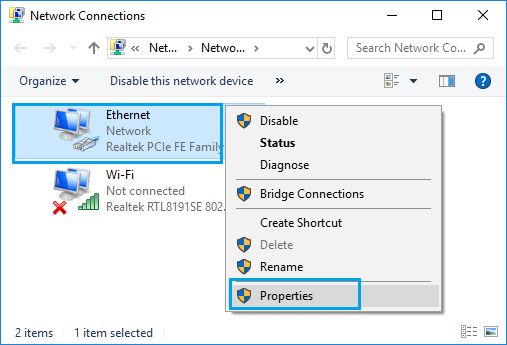
On the next screen, right-click on your WiFi or Ethernet network and click on Properties option in the contextual menu.
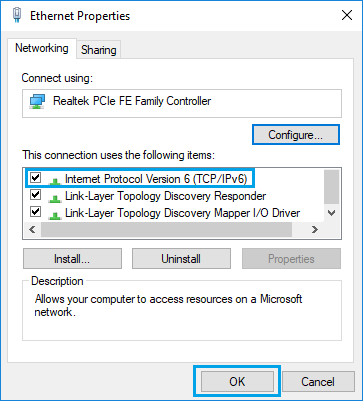
On the Network properties screen, make sure that TCP/IPV6 option is selected.
Click on OK to save this setting on your computer.
How to Password Protect Folders in Windows 10 How to Sync Specific Folder On Computer With Google Drive
![]()