Uninstall Update in Windows 11
Microsoft keeps Windows 11 computers up-to-date and feature rich by pushing Major Updates (Builds), Cumulative Updates and occasional Security updates. The purpose of a Build (Major update) is to push design/appearance changes & introduce New features, while the purpose of a Cumulative Update is to fix bugs in the operating system. If the computer appears to be underperforming or running into problems after installing an Update, Windows 11 provides the option to Uninstall the Update and see if this helps in fixing the problem.
1. Uninstall Regular or Cumulative Update in Windows 11
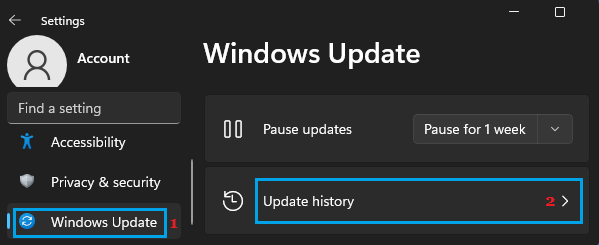
Regular or Cumulative Updates are more frequently delivered by Microsoft and they can be easily removed at any time from the computer. Click on Start button > Settings Icon > select Windows Update in the left-pane. In the right-pane, click on Update History.
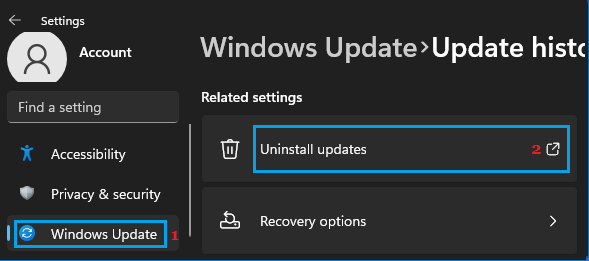
On Update History screen, scroll down to Related Settings section and click on Uninstall Updates option.
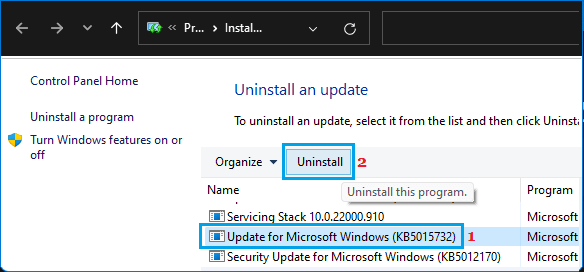
On the next screen, you will see listing of installed updates on your computer. Select the Update that you want to remove and click on the Uninstall option.
On the confirmation pop-up, click on Yes to confirm and wait for Windows 11 to uninstall and remove the selected update from your computer.
2. Uninstall Build in Windows 11
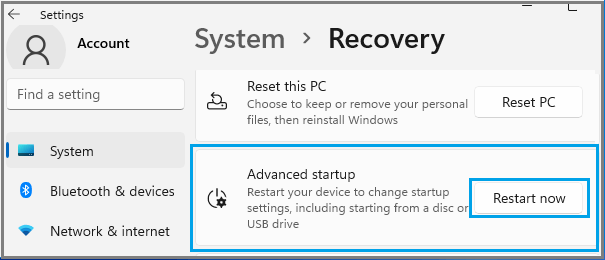
Windows 11 also provides the option to Uninstall Builds or Major Updates. However, this can only be done within the first 10 days of installing the Build. After 10 days, the only way to remove a Build from the computer is to Reinstall Windows 11 or Restore a full system backup on the computer. To remove or Uninstall a Build within 10 days, go to Settings > click on System in the left-pane. In the right-pane, scroll down and click on Recovery.
On the Recovery screen, scroll down in the right-pane and click on Restart Now button located next to Advanced Startup.
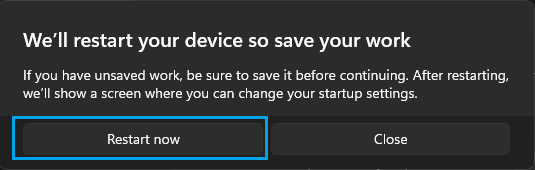
On “We’ll Restart Your Device So Save Your Work” prompt, click on Restart Now to restart the computer.
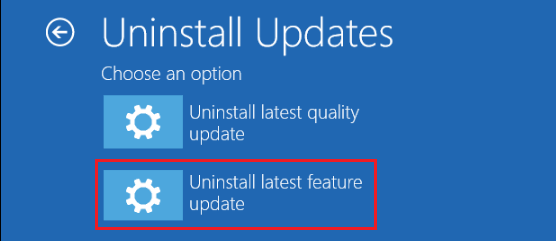
After the computer restarts, navigate to Troubleshoot > Advanced Options > Uninstall Updates > Uninstall Latest Feature Update.
On the confirmation screen, click on Uninstall Feature Update option and wait for Windows 11 to Uninstall and remove the latest Build or Major Update from the computer. Note: When you uninstall a build, your personal files are not deleted or removed from the computer. However, any changes made to Settings and Apps will be removed.
How to Check RAM Size, Speed & Type in Windows 10/11 High CPU Usage in Windows 11: How to Fix?